Building an API based temperature sensor
15 Aug 2018 • Programming
The goal of this short summary is to explain how you can build a small API based temperature sensor that costs less than 10$ and can be used anywhere. I use this sensor at my office to log the temperature and then display it on a smart dashboard.
Parts
We will be using the following parts. You can get most of them on Aliexpress.
- Wemos D1. This is an Arduino-like board with an integrated WiFi chip.
- Adafruit MCP9808 Precision I2C Temperature Sensor.
- Micro-USB charger. We will need this one to power our board and the sensor.
- Soldering iron. To solder the temperature to cables to connect it to the board.
- 4 jumper cables.
Putting it all together
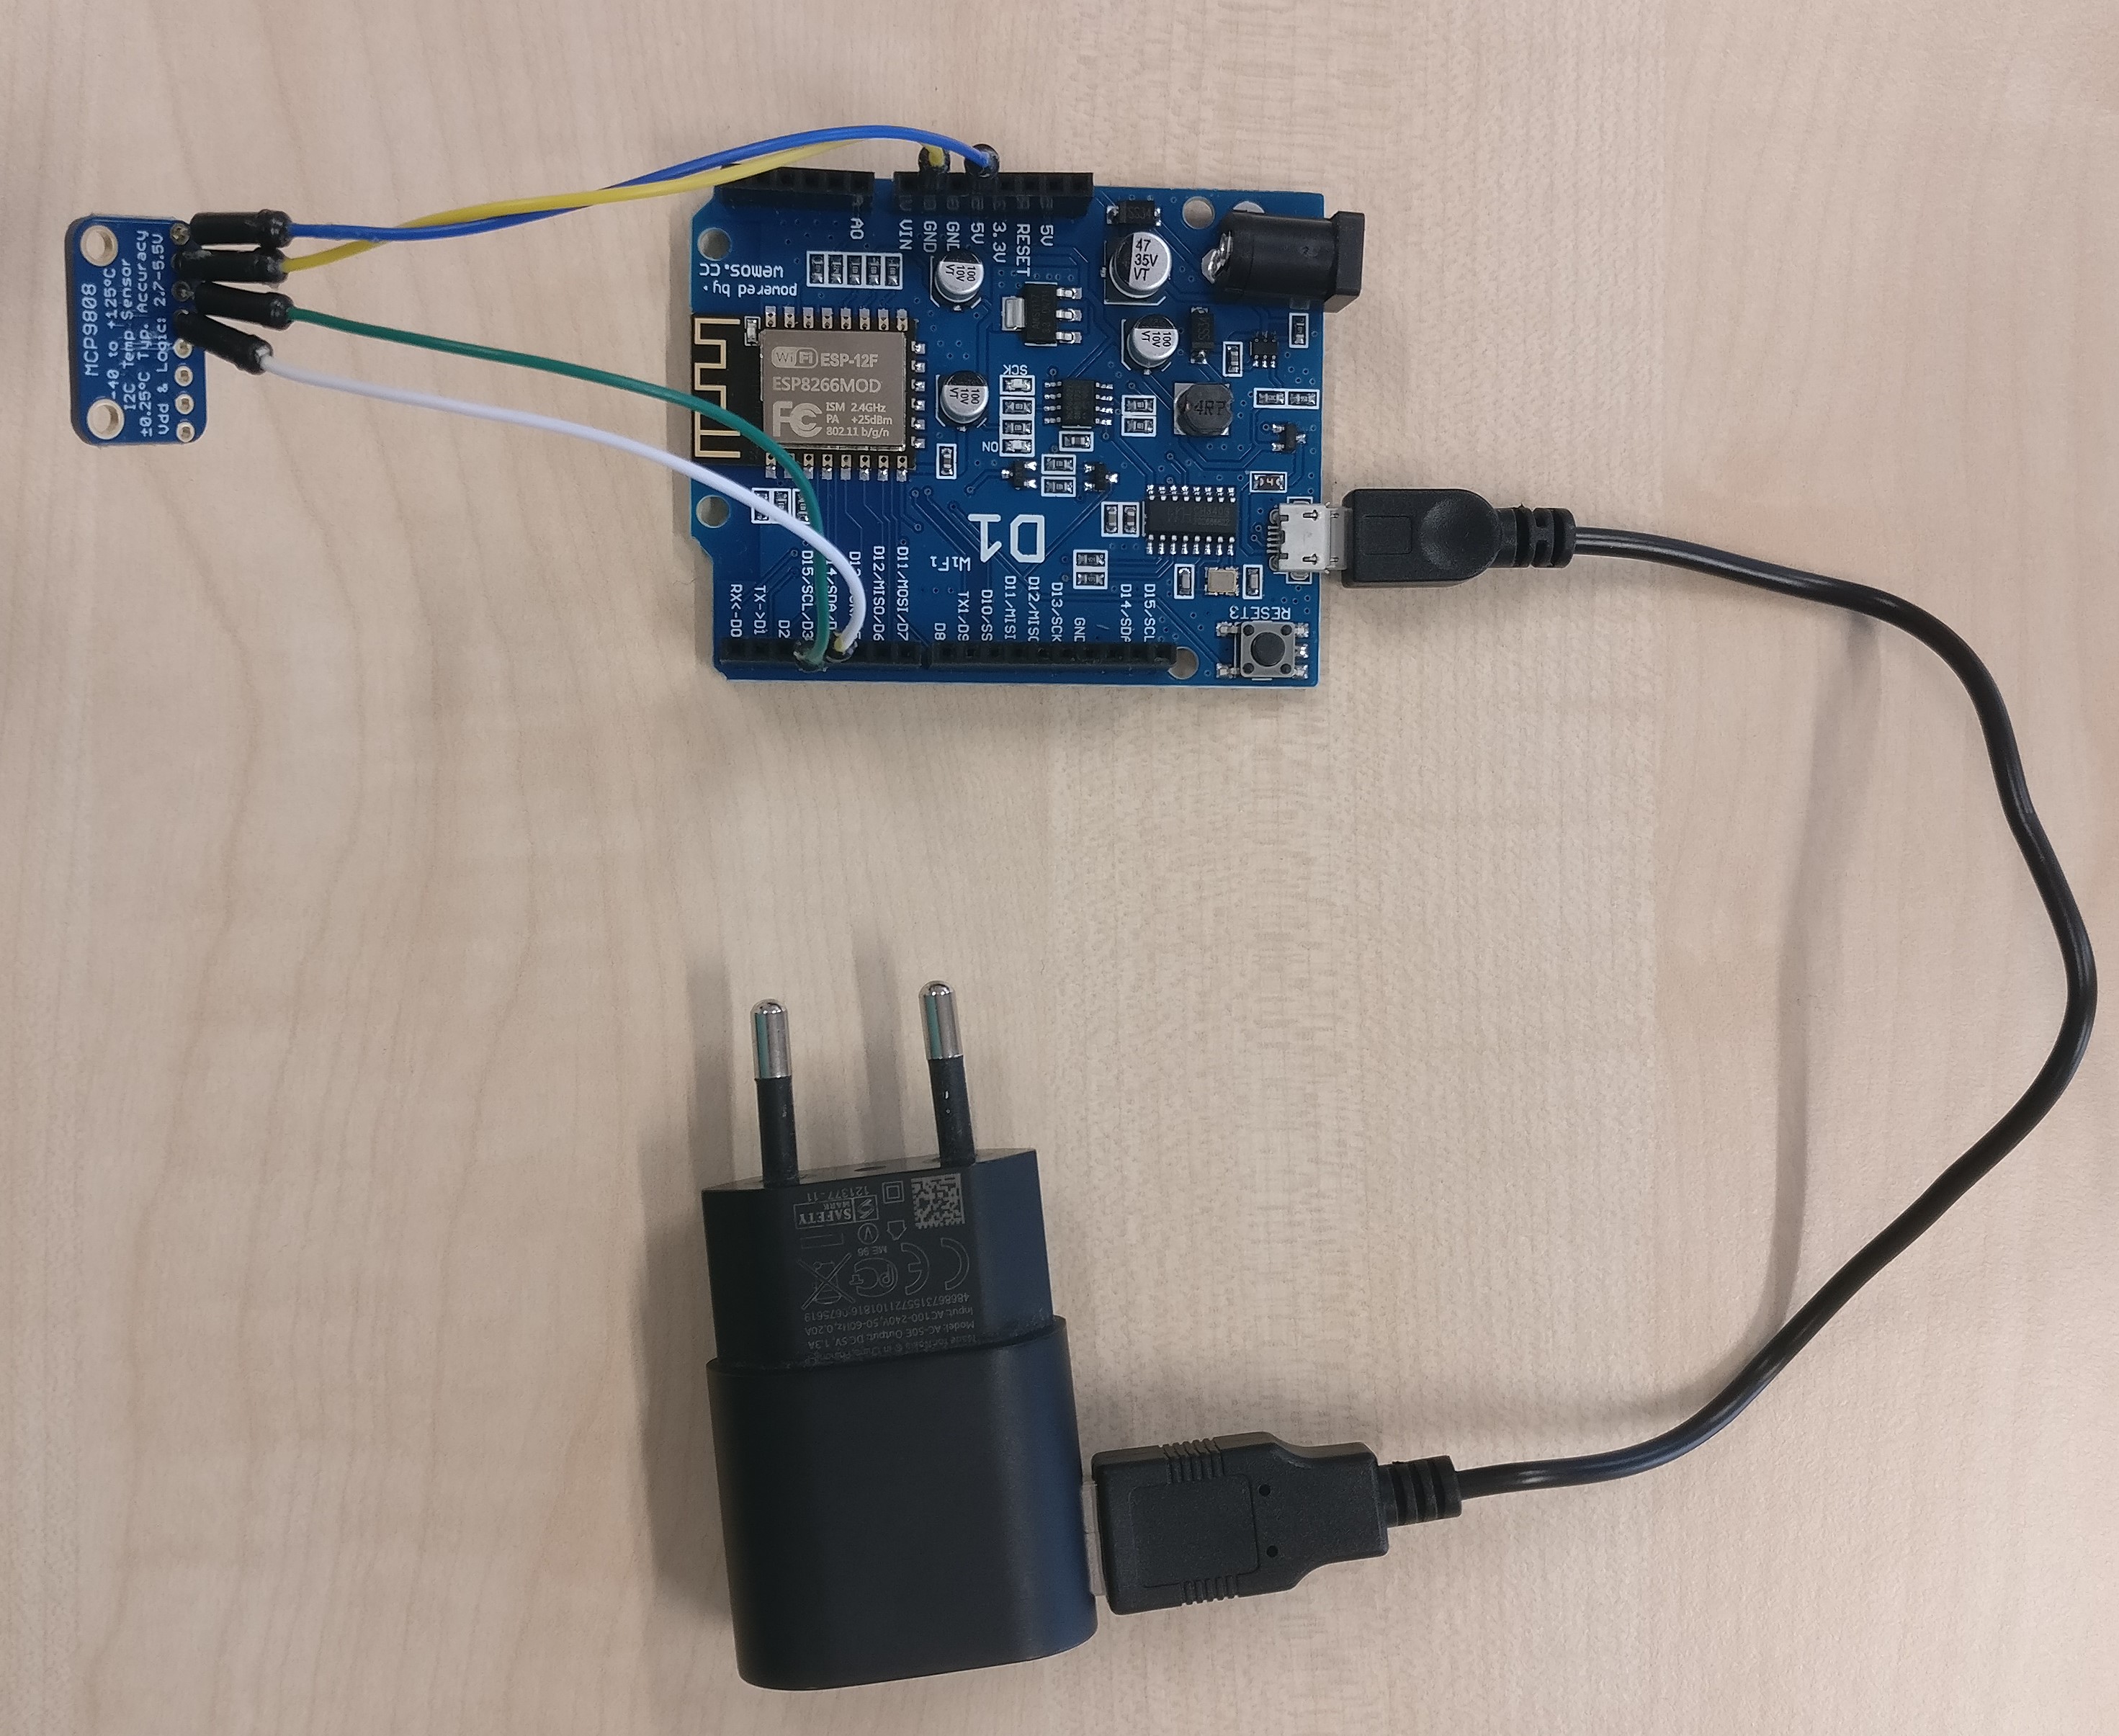
This is actually fairly easy. Solder 4 wires to the ground, VCC, SDA and SCL pins of your temperature sensor. Then connect these wires as follows to your Wemos D1:
- VCC can be plugged into the 3V or 5V power outlet on the wemos board.
- SDA should go into the analog input labelled SDA.
- SCL should go into the analog input labelled SCL.
- Ground can be connected to any ground pin on the wemos board.
Make sure to get a micro USB cable and a charger to power everything.
You can use my board as a reference on how your board should look:
Programming the Wemos D1
Before we can start programming we must make sure we have all the
necessary tools available. We will need a copy of the Arduino editor. In
the Arduino editor open
Tools -> Boards -> Boards Manager and activate the
esp8266 boards. If you cannot find them in the menu make
sure to first add
http://arduino.esp8266.com/stable/package_esp8266com_index.json
under File -> Preferences as a
Additional Board Manager URL.
Having done all the required set-up work we can now move on to programming our board. I have decided to flash my board with the code below. Feel free to use it too, you will however need to change your WiFi credentials and your API settings.
In the code below the board measures the temperature every 2 minutes and then sends the measurements via a get request and an API key to a server. This is definitely not the most secure or elegant way of transmitting temperature data, but since this is a small side project it probably is good enough.
#include <Wire.h>
#include "Adafruit_MCP9808.h"
#include <Esp.h>
#include <ESP8266HTTPClient.h>
#include <ESP8266WiFi.h>

// Create the MCP9808 temperature sensor object
Adafruit_MCP9808 tempsensor = Adafruit_MCP9808();

void setup() {
  Serial.begin(9600);
  WiFi.begin("ssid", "password");   //WiFi connection

  while (WiFi.status() != WL_CONNECTED) {
    //Wait for the WiFI connection completion
    delay(500);
    Serial.println("Waiting for connection");

  }
  Serial.println("WiFi works");

  if (!tempsensor.begin())
  {
    Serial.println("Couldn't find MCP9808!");
    while (1);
  }
    Serial.println("Temperature works");
}

void loop() {
  if(WiFi.status()== WL_CONNECTED){   //Check WiFi connection status
   Serial.println("beginning measurement and submission");
    HTTPClient http;    //Declare object of class HTTPClient
    float c = tempsensor.readTempC();
    String postString = "temperature="+ String(c) + "&apiKey=apiKey";
    http.begin("http://api.domain.com/temp?" + postString);
    //Specify request destination
    http.addHeader("Content-Type", "text/plain");
    //Specify content-type header
    Serial.println("Measured" + String(c));
    int httpCode = http.GET();   //Send the request
    String payload = http.getString();      //Get the response payload
    Serial.println(payload);    //Print request response payload
    http.end();  //Close connection
  }else{
    // if the WiFi connection didn't work,
    // we will restart our board and try again.
    Serial.println("Error in WiFi connection");
    // reboot
    ESP.reset();
  }
  tempsensor.shutdown_wake(1);
  delay(120000);  //Send a request every 120 seconds
  tempsensor.shutdown_wake(0);
}
Server
We will need to handle the request we have sent from the sensor on a server. The following code is a very simple example:
from flask import Flask, request

app = Flask(__name__)

@app.route('/temp', methods=['GET'])
def submit_temperature_data():
    print(request.args["apiKey"] + '\n')
    print(request.args["temperature"] + '\n')
    return ''

if __name__ == "__main__":
    app.run()
If you don’t feel like deploying the code to a server you can use your local development machine and a service like ngrok. It has saved me from a great deal of pain, since this simplifies debugging.
Conclusion
Instead of having a very light-weight Flask server, I have opted for a sinatra server (running on top of ruby) and then logging the temperature to a MongoDB database which is then further processed to be used on my other small project FlashDash.
I hope that if you are planning a similar project that my project can be of some help to you.
Sources
The arduino code example and the soldering schematics have been taken / adapted from:
- https://techtutorialsx.com/2016/07/21/esp8266-post-requests/
- http://www.esp8266learning.com/wemos-mcp9808-digital-temperature-sensor-example.php
Have any feedback?
Please feel free to send me a mail! I would love to hear from you.